It is my guess, based on questions I am asked on the courses I run, that the majority of people do not end up with particularly good images. Most digital camera-owners simply hand their camera’s memory card to the guy or gal behind the counter at the one hour lab and pretty well accept the results dished up to them.
This entry is a quick, down-and-dirty lesson that I hope will help you improve your images during the post-processing phase and show you how to get them the way you want them to look. This page can be downloaded as a PDF here.
To do this you need an image manipulation programme. The market-leader is undoubtedly Photoshop and Photoshop Elements followed by an up-and-coming Paintshop Pro.
These are brilliant pieces of software but for many, are simply too expensive.
GIMP
But there is an extremely powerful, albeit quirky, absolutely free alternative. GIMP has been around for years and, in my opinion, is in many ways better than Photoshop, though others will feel differently. More power to them. This entry is not about the merits of the software. Use which ever you prefer, the principles are the same.
GIMP can be downloaded at www.gimp.org and the latest stable release now is version 2.6.4. I’ll assume you have it loaded on your computer.
Note: Images are not displayed at full size on these blog pages and are not easy to see. Simply click on the image and a full-sized version will be loaded!
Step 1:
Launch GIMP. The toolbox and the working area will open in separate windows.
Step 2:
Click “File” then “Open” and select the image on which you want to work. Click the “Image” drop-down menu and make a duplicate so you always have the original if you mess up. Name the duplicate and close the original.
The image I selected for this example was shot with a Kodak digital point-and-shoot and, as you can clearly see, is washed-out and lacks “oomph”. The highlights in the sky on the right-hand side are blown out and cannot be recovered but let’s see what else we can do.
Step 3:
Select “Colours” from the list of drop-down menus at the top of the working window then select “Levels”. (In Photoshop the sequence is “Image” then “Adjustments” then “Levels”.)
A window like that in Fig 2 will open displaying a histogram. Notice how the graph stacks up against the right-hand edge of this picture’s histogram -- that clearly shows some of the highlights have been blown out.
Directly under the graph are three “arrowheads” that indicate the image’s black point, mid-tone and white point.
In this example I dragged the black point as well as the mid point to the right in order to darken those areas. There is no purpose in attempting to adjust the white point as dragging it to the left will only make it lighter.
Adjust the arrowheads until you are happy then click “OK”.
The picture already looks better but there is still more we can do.
I think the colours should be more punchy.
Step 4.
Select “Colours” then “Hue/Saturation”.
Dragging the “Saturation” slider to the right makes the colours pop. Play around with the sliders until you have the result you want. When you’re happy click “OK”. Remember you can undo any step by opening the “Edit” menu and selecting “Undo”.
Now it’s time to add a little contrast.
Step 5:

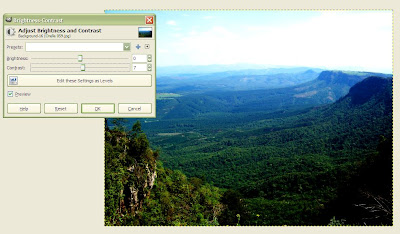
Figure 4. Adjusting Contrast
Go to “Colours and select “Brightness-Contrast”. Move the sliders until you are happy then click “OK”.
Step 6:

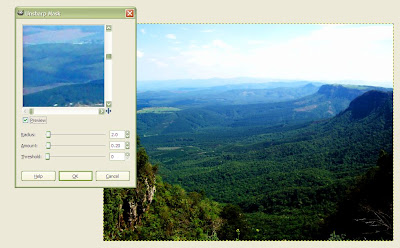
Figure 5. Unsharpening
The final requirement is to sharpen the picture. Select “Filters”, “Enhance”, “Unsharp Mask”. Yep, that’s correct it’s UNSHARP MASK for reasons I won’t discuss now.
I believe sharpening must be done in small steps or else it is easy to over-sharpen and end up with an unnatural and unattractive image. These are the settings I use, but experiment and see what you like.
Click “OK”, you’re done. All that remains is to save your picture, write it onto CD and get it printed.

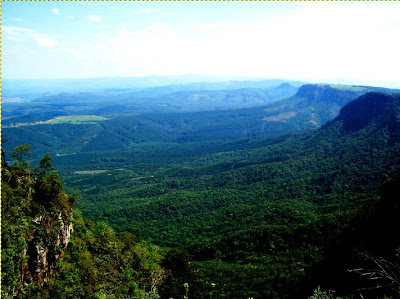
The finished product. Not great art but a definite improvement!
Before I get flames from the experts I know there are a lot more ways to improve images by using layers, masks, dodging and burning HDR techniques etc. I teach some of these in a course I run.
The intention of this article was to present a quick, easy way to improve images.


No comments:
Post a Comment